

Porter Domains
Porter generates placeholder domains for all Web services. These placeholder domains follow the format of*.onporter.run. While these domains can be used in production, we highly recommend attaching a custom domain to your production web services.
Custom Domains
Setting up a custom domain involves two steps: setting up a DNS record to point to that domain, and then configuring your Web service to listen on that custom domain:DNS Setup
You must first find the DNS name assigned to the load balancer of your cluster. This can be found under the Networking tab of your Web Service: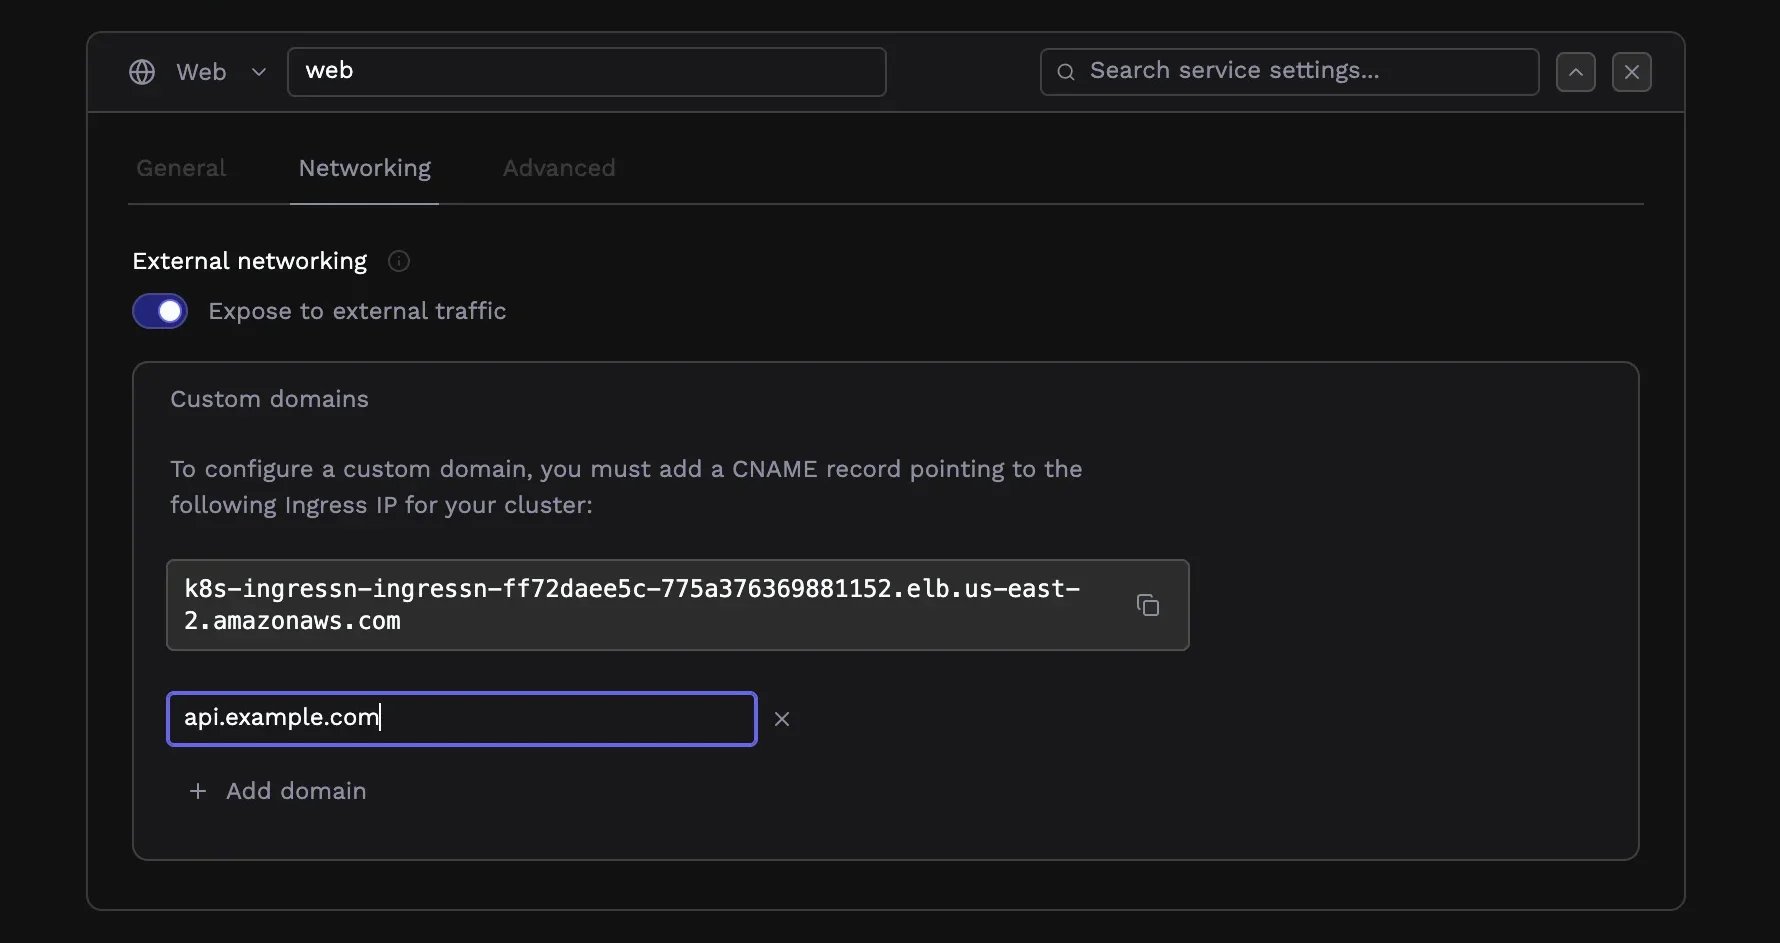
Google Cloud and Azure
On Google Cloud and Azure, the load balancer that sits in front of your infrastructure has a static IP address. Therefore, you have to create anA record in your DNS provider that points to that static IP address.
The name of the record should be the subdomain you want to use (e.g. app.mydomain.com),
and the value should be the IP address of the load balancer that you copied above.
Amazon Web Services
For clusters deployed on AWS, you need to create aCNAME record that points at the DNS name for your load balancer.
Please follow instructions below, based on the type of domain you are creating:
- Subdomain -> domains of the format
*.porter.runsuch ascloud.porter.run,myapp.porter.run - Apex domain -> top level domains, of the format
porter.run
- Subdomain
- Apex Domain
Create a 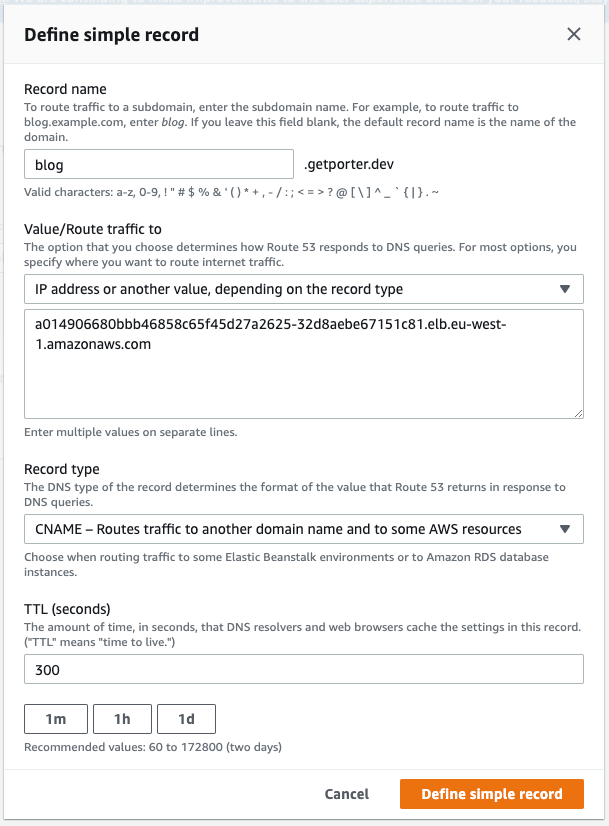
CNAME record on your DNS provider for your desired subdomain, which points to the load balancer URL you have copied above. Make sure you exclude the protocol http:// and any trailing / from the URL string. For example, on Route 53, this looks like the following:After you complete the previous steps, it might take up to 30 minutes for DNS records to fully propagate. Please wait before deploying your applications until the DNS propagation is complete. You can check this using tools like dnschecker.org or running
nslookup <your-domain>.Deploying on the Custom Domain
Once the DNS record changes have been propagated, you will be able to attach the custom domain to your application. Click on Add Custom Domain, input the custom domain you have just pointed to the load balancer, then hit deploy. In a few minutes, you will be able to view the application on the custom domain, secured with an SSL certificate.Retrying a failed certificate
If certificate issuance fails for a custom domain (for example, because DNS had not propagated yet when the first attempt ran), the domain row in your application header shows a warning icon next to the hostname. To retry issuance without redeploying the application:- Open the application and locate the failed domain in the header.
- Hover or focus the domain. The warning icon swaps to a retry icon.
- Click the domain to trigger a new certificate request.
pending while cert-manager attempts issuance again, followed by the healthy state once the certificate is issued. The same retry control is available on preview environment domains.
Make sure the DNS record for the domain points at your load balancer before retrying. If DNS is still misconfigured, the next attempt will fail for the same reason.